
 Weighing
How to Set Up Analytical Balances the Right Way

How do you set up an analytical balance correctly? Put it on a rigid weighing bench away from doors, windows, and ventilation, level it, let it warm up per the manufacturer's instructions, and only then calibrate. Below is how to handle each step and what to check on site.
Analytical balances read tenths and hundredths of a milligram. At that level of precision, any draft from an air conditioner, vibration from a refrigerator compressor, or airflow from an open door shows up. Readers often look for the cause in the instrument when it's really the room.
We'll cover room and furniture requirements, the setup and adjustment sequence, and when you need balance calibration versus official verification.
How to Set Up an Analytical Balance: A Step-by-Step Sequence Without Mistakes
The balance's sensitive element converts load into an electrical signal. Any external force—whether a bump to the bench or a draft—causes spurious displacement and reading drift. The instrument is fine, but the numbers on the display wander.
A practical check: place a weight on the pan and simply slap the bench next to it. If the reading jumps and doesn't quickly return to the original number, the bench or floor is transmitting vibration. Repeat with the draft shield door open and closed—the difference shows the contribution of air currents.
Another test: turn the balance on and leave it unloaded for 10–15 minutes. A stable instrument stays within the last digit, while jumps of several units point to external interference.
Remember the one-location rule. Every time you move the balance within the room, you need to re-level it and recheck operating conditions. Give the instrument a permanent spot for routine weighing.
Room Requirements for Balances: Vibration, Drafts, Temperature, and Humidity
Choose a separate room or zone away from vibration sources: compressors, centrifuges, stirrers, ventilation equipment, heavy doors. Don't place the balance in walkways or near aisles.
Drafts are easy to check. Hold a thin strip of paper or a light thread near the weighing area: noticeable deflection means airflow. Close the draft shield doors and confirm the movement stops. Draft protection starts with a closed door and no ventilation grille above the bench. Otherwise, find the cause: a gap under the door, a vent above the bench, a window.
Keep temperature and humidity within the manufacturer's range. Temperature and humidity affect balances more when they fluctuate sharply than when stable: the balance should sit in a room with a consistent climate around the clock. Direct sunlight on the housing heats the weighing chamber and skews readings.
Check humidity during rainy season and winter: condensation on the draft shield glass shows conditions are outside the range. In such cases, an air conditioner with a steady setpoint and a humidifier help, but their airflow must not hit the balance.
Choosing a Bench for Analytical Balances and an Anti-Vibration Plate, Static Protection
A standard lab bench works for sample prep, but analytical balances need a rigid weighing bench or a massive plate on stable supports. Tabletop movement from a hand, nearby footsteps, or adjacent equipment is unacceptable.
| Base option | When it fits | What to check |
|---|---|---|
| Standard lab bench | Auxiliary tasks, weighing on coarse balances | Wobble, thin tabletop, proximity to walkways |
| Weighing bench | Analytical balances in routine work | Frame rigidity, adjustable feet, no casters |
| Anti-vibration plate | Centrifuges, compressors, pumps running nearby | Vibration source, level floor, plate mounting |
An anti-vibration plate for balances is needed where vibration can't be eliminated by relocating the instrument. Vibration protection isn't just one plate: it doesn't compensate for the bench's own shaking, so both elements work together.
Static protection matters more than it seems: plastic vessels and dry air produce a discharge that throws off readings. Ground the balance per instructions, use anti-static ionization or humidity within the manufacturer's range. Don't wipe the glass and housing with a dry cloth before weighing.
Setting Up an Analytical Balance: Unpacking, Leveling, Power-On, and Warm-Up
The procedure is the same for most models, but the manufacturer's manual takes priority.
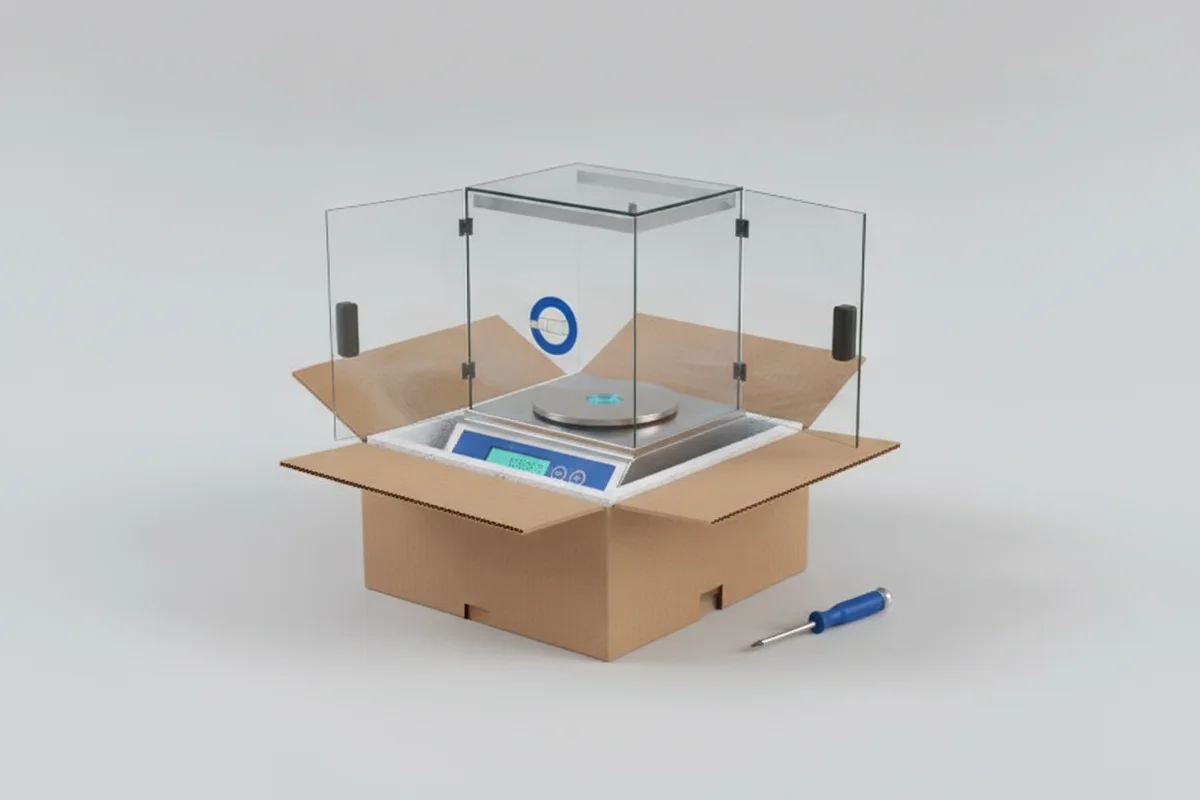
- Unpack the instrument, remove shipping locks and protective pads from the pan and suspension.
- Place the balance on the prepared bench—carry it, don't drag it across the surface.
- Center the level bubble using the adjustable feet. The housing must sit level without rocking.
- Plug in the instrument and let it warm up for as long as the manual specifies. Warm-up time for analytical balances varies by model; don't cut it short.
- Check the response to load and return the reading to zero.
How do you set up an analytical balance without leveling mistakes? Leveling an analytical balance is a two-step process: first adjust the feet, then confirm the bubble is centered, and only then close the door. A tilt of even a fraction of a degree causes noticeable error, so re-level after any move.
Initial Calibration of Analytical Balances and Setup Before Work
Once the balance is warmed up and leveled, run internal calibration if the model supports it. For external calibration, use a certified weight matching your balance's accuracy class.
- Make sure the weighing chamber is empty and the doors are closed.
- Start calibration from the menu and wait for completion without touching the bench.
- Check the result with a test weight and log the value.
- Set units, stabilization mode, and filters for your lab's tasks.
For Sartorius and Mettler Toledo models, the procedure is described in the manual for each series, including weight types and acceptable deviation. Don't log a result that deviates from the method—repeat the cycle instead.
Check cleanliness before and after calibration: dust on the pan and spills change results. If calibration fails or repeatedly doesn't pass, check power and bench stability before calling service.
Common Setup Mistakes and How to Avoid Them
Most problems appear in the first few days, and each has a clear cause.
| Mistake | Risk | How to avoid |
|---|---|---|
| Balance near a door or window | Reading drift, slow stabilization | Move to a quiet zone, check airflow with paper |
| Bench with casters or a thin top | Fluctuations from footsteps and nearby hands | Rigid weighing bench with adjustable feet |
| Calibrating right after power-on | Incorrect result before warm-up | Wait the time specified by the manufacturer |
| Ignoring the level | Systematic error | Level after every move |
A real-world quote: 'We put it by the air conditioner because there was an outlet nearby.' The result is a minute lost on every weighing. Extending the outlet is easier.
Frequently Asked Questions
Can an analytical balance be placed in a fume hood?
No. The hood transmits fan vibration and creates constant airflow. Weighing should be done in a separate zone next to the hood, not inside it.
Are separate weights needed for calibration?
Depends on the model. Internal calibration runs without external weights; external calibration requires a certified set with the appropriate accuracy class. The class must match the balance, or results will be unreliable.
How often should the level be checked?
Weekly under normal use, and after any move, cleaning, or foot adjustment. The check takes seconds, and a wrong level causes systematic error.
What if there's construction nearby?
During hammer-drilling work, it's best to turn off the balance and cover it. Afterward, check the level, chamber cleanliness, and run a test weighing.
How to Confirm Your Balance Is Set Up Right: 5 On-Site Tests
After setup and warm-up, don't start serial weighings immediately. Spend 20–30 minutes on five checks: they'll show whether the location holds the stated accuracy or the instrument will drift all day.
Test 1. Repeatability with one weight. Take a certified weight (e.g., 100 g class E2), place and remove it 6–8 times in a row, recording each reading. The spread between highest and lowest should not exceed the balance's specified repeatability. If the instrument gives ±0.3 mg versus a spec of ±0.1 mg, the cause is usually the bench or vibration.
Test 2. Response to a nearby step. Place the weight, wait for a stable reading, and walk past the bench at a normal pace one meter away. A shift of more than 1–2 digits means the floor or bench is transmitting vibration. Solution: move the balance to a corner near a load-bearing wall or add an anti-vibration plate.
Test 3. Draft. Turn on the hood, air conditioner, and a fan in the adjacent zone one at a time while watching the reading with a weight on the pan. A stable reading shouldn't drift in one direction for more than 5–10 seconds. If it drifts, find the airflow source: a gap under the door, a vent above the bench, an open window.
Test 4. Static. Bring a plastic ruler or synthetic cloth within 5–10 cm of the pan and remove it. The reading shouldn't jump up or down. A jump means the room is dry and charge is building: you need an ionizer or bench grounding.
Test 5. Thermal stability. Record the weight reading, turn on a desk lamp or a device that heats up nearby, and repeat the measurement after 15 minutes. A shift of more than 1–2 digits confirms that heat sources shouldn't be placed near the balance.
| Test | What you do | Normal | What deviation means |
|---|---|---|---|
| Repeatability | 6–8 weight placements | Spread within spec | Bench, vibration, static |
| Step nearby | Walk 1 m from the bench | Shift no more than 1–2 digits | Floor or bench supports |
| Draft | Turn on hood and AC | Reading stable | Airflow at the pan |
| Static | Bring plastic or cloth close | No jump | Dry air, no grounding |
| Heat | Heating device nearby 15 min | Shift 1–2 digits | Heat source near balance |
Balance Setup Log: What to Record to Hold Your Ground with Inspectors
During verification and internal audits, labs are asked not only for the balance certificate but also for evidence that the instrument was operated under normal conditions. Keep a simple log on the first page of the manual or in a separate file: it takes 10 minutes at setup and eliminates half the questions during inspection.
What to record at commissioning:
- Date and time of setup, instrument serial number.
- Location: room, floor, distance from doors, windows, and ventilation in meters.
- Bench and plate type, anti-vibration support model.
- Level test results (bubble centered position).
- Warm-up time per spec and actual time before first weighing.
- Calibration results: date, weight mass and class, readings before and after.
- Room conditions at setup: temperature in °C, humidity in %.
After that, just add three lines whenever readings are in doubt: date, what was checked, result. If a discrepancy arises with an inspector, such a record shows the balance was kept under acceptable conditions, not by an open window.
If you're setting up a balance in a new lab, attach a floor plan to the log marking the balance location and all vibration and heat sources. The same plan will be useful when you install centrifuges or stirrers: you can see the free zone around the weighing bench and avoid moving the instrument again.
When You Need Verification and Regular Balance Calibration
Calibration adjusts the instrument and confirms its condition for internal purposes. Official verification is a procedure with an official document, performed on schedule and per OIML and national metrology service requirements.
A practical guideline: repeat calibration after relocation, repair, bench replacement, a drop, or a sudden reading jump, and follow the manufacturer's schedule for routine work. Plan verification in advance so you don't halt testing and product acceptance.
Regular balance maintenance in the lab includes not only adjustment but also mechanical checks, chamber cleaning, and power diagnostics. For purchasing new equipment and consumables, browse the analytical equipment section, and compare brands and models on the lab equipment brands page. Analytical balance accuracy rests on three things: a level bench, a stable climate, and regular calibration.
The bottom line: correct installation delivers stable readings, while calibration and verification make them official. If you need help choosing scales, having them supplied, or arranging after-sales service, the experts at LPS UZ can advise you on compatibility and next steps.